
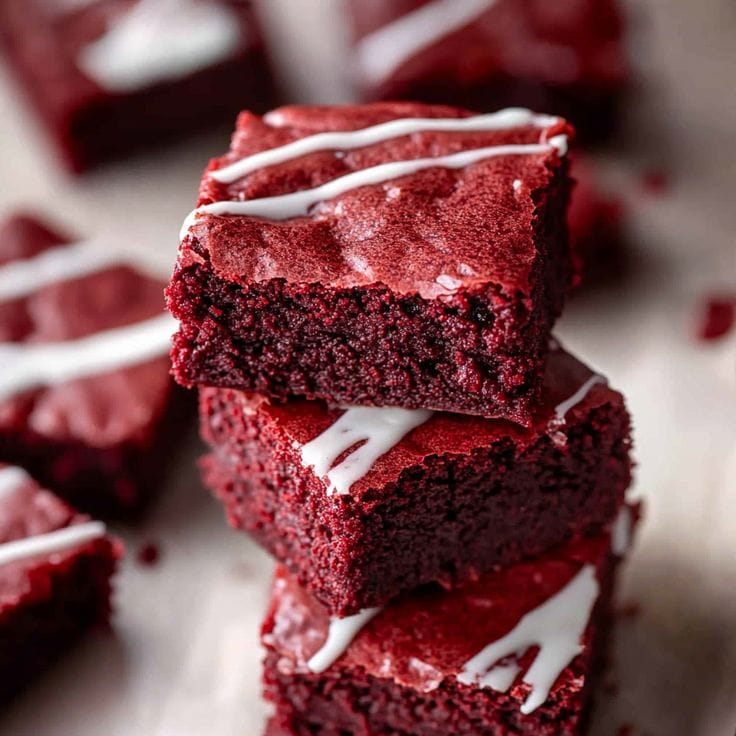
Red Velvet Brownies Recipe: A Decadent Twist on a Classic Favorite presents an elegant approach to a beloved classic. The recipe outlines the steps to create indulgent Red Velvet Brownies, offering a sophisticated twist on traditional flavors. With a rich and velvety texture, these Red Velvet Brownies are sure to delight the taste buds of those seeking a luxurious dessert experience.
In this article, you’ll learn how to make the perfect red velvet brownies, common mistakes to avoid, variations to try, and tips for achieving that rich, fudgy texture every time.
Why Red Velvet Brownies Are the Ultimate Crowd-Pleaser
The combination of vibrant red color, mild cocoa flavor, and moist, chewy texture makes red velvet brownies stand out. Unlike traditional brownies, these beauties have a unique tang thanks to the addition of vinegar and cream cheese (optional in the swirl). They balance sweetness with a hint of chocolate bitterness, making them more sophisticated than the average treat.
Powerful Keyword Focus: Red Velvet Brownies Recipe
When people search for “red velvet brownies recipe,” they’re looking for something eye-catching, easy to make, and guaranteed to taste amazing. That’s what we deliver here—an easy-to-follow recipe paired with expert baking tips and keyword-rich content to make it SEO-friendly and informative.
Ingredients for Red Velvet Brownies
To make these decadent brownies, you’ll need pantry staples plus a few signature red velvet ingredients:
- 1/2 cup unsalted butter, melted
- 1 cup granulated sugar
- 2 large eggs
- 1 teaspoon vanilla extract
- 1 tablespoon red food coloring (liquid or gel)
- 1/4 cup unsweetened cocoa powder
- 1/4 teaspoon salt
- 3/4 cup all-purpose flour
- 1 teaspoon white vinegar
Optional Cream Cheese Swirl:
- 4 oz cream cheese, softened
- 1/4 cup sugar
- 1 egg yolk
- 1/2 teaspoon vanilla extract
Step-by-Step Instructions for the Best Red Velvet Brownies
1. Preheat the Oven
Set your oven to 350°F (175°C). Line an 8×8-inch baking dish with parchment paper or lightly grease it with cooking spray.
2. Prepare the Brownie Batter
In a large bowl, mix melted butter and sugar until smooth. Add eggs, vanilla extract, and red food coloring, stirring until combined.
3. Add Cocoa, Flour, and Vinegar
Stir in the cocoa powder and salt, then gradually fold in the flour. Finally, add the vinegar—this small ingredient helps enhance the red hue and adds a subtle tang.
4. Make the Cream Cheese Swirl (Optional)
In a separate bowl, beat cream cheese, sugar, egg yolk, and vanilla extract until creamy.
5. Assemble the Brownies
Pour the red velvet brownie batter into the prepared pan. Drop spoonfuls of the cream cheese mixture on top and swirl gently using a knife or skewer for a marbled effect.
6. Bake
Bake for 25–30 minutes, or until a toothpick inserted comes out with a few moist crumbs. Let them cool completely before slicing.
The secret to moist brownies lies in a few key techniques and ingredient choices that affect texture, moisture retention, and richness:
✅ 1. Use More Fat than Flour
- A higher butter-to-flour ratio makes brownies rich and moist. Recipes that lean toward fudgy (rather than cakey) usually use less flour and more butter or oil.
✅ 2. Do Not Overbake
- This is the #1 reason brownies turn out dry.
👉 Bake just until a toothpick inserted comes out with a few moist crumbs—not clean.
👉 Slight underbaking = gooey center that sets as it cools.
✅ 3. Add Melted Chocolate or Cocoa
- Brownies with melted chocolate in the batter tend to be more moist than those using only cocoa powder.
Tip: Combine both for the best of both worlds.
✅ 4. Incorporate Brown Sugar
- Brown sugar adds moisture because it contains molasses. Try replacing some of the white sugar with brown sugar for a chewier, moister texture.
✅ 5. Don’t Overmix
- Overmixing after adding the flour can create too much gluten, leading to dense, dry brownies.
👉 Stir just until the flour disappears.
✅ 6. Let Them Cool in the Pan
- Allow brownies to cool in the pan after baking. This helps them retain moisture and firm up without over-drying.
Tips for Fudgy and Flavorful Red Velvet Brownies
1. Don’t Overbake
Brownies continue to cook after removing them from the oven. For gooey centers, pull them out when the edges are set but the center still jiggles slightly.
2. Use Quality Cocoa
Since red velvet has a light chocolate taste, using a high-quality unsweetened cocoa powder ensures the best flavor.
3. Red Food Coloring: Gel vs. Liquid
Gel-based food coloring gives a more vibrant red with less quantity. Liquid works, but you may need more, which can slightly affect consistency.
4. Let Them Cool
For clean cuts and perfect presentation, always allow the brownies to cool before slicing.
Red Velvet Brownies Variations You’ll Love
1. Red Velvet Cheesecake Brownies
Double the cream cheese swirl mixture and layer it for a cheesecake-like experience.
2. Red Velvet Brownie Bites
Use a mini muffin tin to create bite-sized treats—perfect for parties or gifting.
3. Gluten-Free Red Velvet Brownies
Substitute all-purpose flour with a 1:1 gluten-free baking flour. Check labels to ensure other ingredients are gluten-free as well.
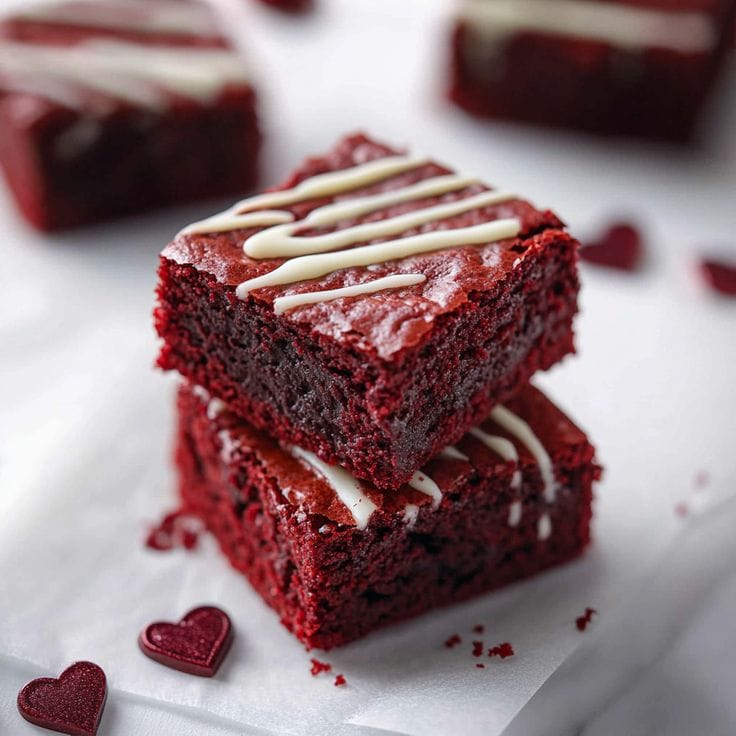
4. Valentine’s Day Red Velvet Brownies
Cut into heart shapes with a cookie cutter and drizzle with white chocolate for an extra-special touch.
Common Mistakes to Avoid When Making Red Velvet Brownies
1. Overmixing the Batter
Overmixing can lead to dense, dry brownies. Mix just until combined.
2. Using Too Much Food Coloring
Too much red coloring can give an artificial taste. Measure carefully and use gel for better control.
3. Skipping the Vinegar
While it may seem strange in dessert, vinegar balances the flavor and enhances color.
4. Overbaking
Dry brownies are often a result of baking too long. Always check a few minutes early.
5. Not Measuring Flour Properly
Spoon flour into your measuring cup and level off. Scooping directly can lead to packed flour and dry texture.
Serving and Storing Red Velvet Brownies
Serving Ideas:
- Dust with powdered sugar or cocoa powder
- Serve with a scoop of vanilla ice cream
- Drizzle with white or dark chocolate
Storage:
Store in an airtight container at room temperature for up to 4 days, or refrigerate for up to a week. You can also freeze red velvet brownies for up to 2 months—just thaw before serving.
Why This Red Velvet Brownies Recipe Deserves a Spot in Your Favorites
This red velvet brownies recipe is not just a feast for the eyes—it delivers on taste, texture, and ease of preparation. Whether you’re a seasoned baker or a newbie in the kitchen, this recipe is simple to follow and yields consistently delicious results.
Conclusion
Red velvet brownies are more than just another sweet treat—they’re a showstopper. With their luxurious texture, brilliant color, and irresistible flavor, these brownies check all the boxes for a perfect dessert. Follow this red velvet brownies recipe to impress your family, wow guests, or treat yourself to something truly special.
If you love bold flavors, soft centers, and the nostalgic taste of red velvet cake, these brownies are your next favorite recipe